
When it comes to planting, seeds come in all shapes and sizes, which can mean that planting sometimes can make you go a little cross-eyed keeping them in a line and working with them. To make it easier this year we want to highlight some good practice tips to make your planting a little easier.
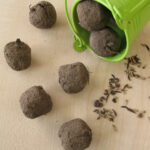
Make some seed bombs for those flowers or herbs that are small and you don’t mind the order in which they grow in. How to make seed bombs.
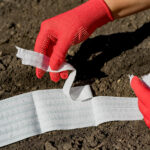
Create seed paper or tape to keep track of your spacing and keep the weeds down. It will also help with those hard to see seeds and dealing with thinning later on. How to make seed tape.
Scarify or soak large seeds with tough shells to help with germination. First punctured or softened, just before you want to plant them. This allows the water and gases necessary for germination to enter the seed faster. A simple way to do this is to gently roll your seeds between two sheets of sandpaper until the seed coat just starts to rub off. Stop at this point or you risk damaging the seeds.

Roll out the toilet paper to see those dark seeds against the dark soil. Line your seed drill with toilet paper. The white background makes it easier to see your seeds and to space them evenly along the row.
Using a label will help you to locate rows of seeds, but if you want to be certain you can backfill your seed drill with potting soil so that it stands out from the surrounding soil. This is particularly useful once they start to grow, as it helps you to differentiate seedlings you’ve planted from weeds which need removing.
One other method is to mix quick-growing seeds such as radishes with slow growers like parsnips. The radishes will germinate within a few days to mark the location of the row. They’ll be harvested long before the parsnips grow big enough to need that extra space.
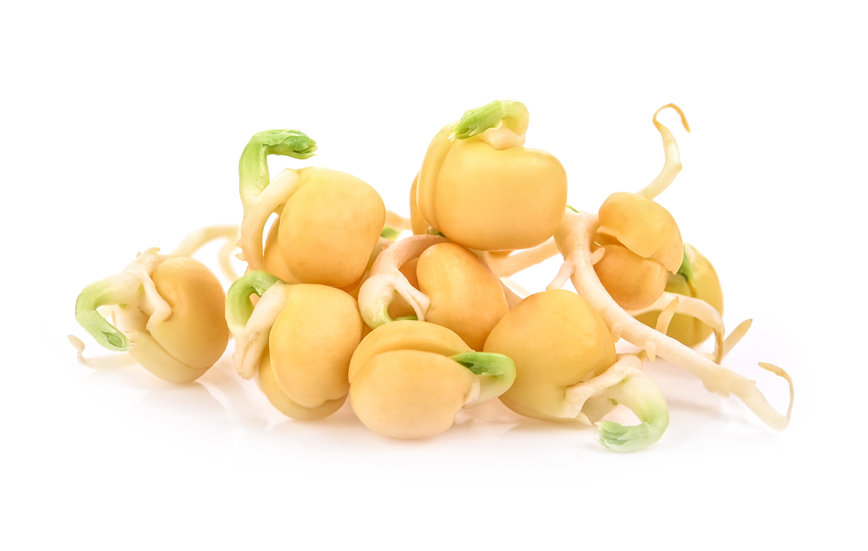
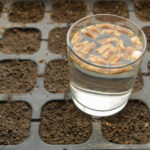
Pre-sprouting or Chitting can be used when time is short and seeds with long germinations need to be planted. This method works particularly well for those seeds that can take weeks to germinate, especially in cool weather. You can also use it for any early-planted seeds to speed things up.
Start by lining a sealable container with a couple of sheets of damp paper towel. Space out the seeds over the surface then add two more layers of damp paper towel over the top. Press on the lid. Keep the container in a warm place at about 8-21ºC, or 65-70ºF. As soon as the seeds are showing tiny roots they are ready to plant.
Don’t delay planting or the roots may end up distorted or forked. You needn’t worry about planting them the right way up – the seeds will naturally send the roots downwards.

Get your spacing right with using any of the many different types of seed-spacer tools on the market or you can make your own with simple things from around the house. How to make a standing seed planter. How to make a seed spacing board.


Comments are closed